How Long to Bake Chicken Breast at 400°F (By Ounce Weight & Thickness Chart)
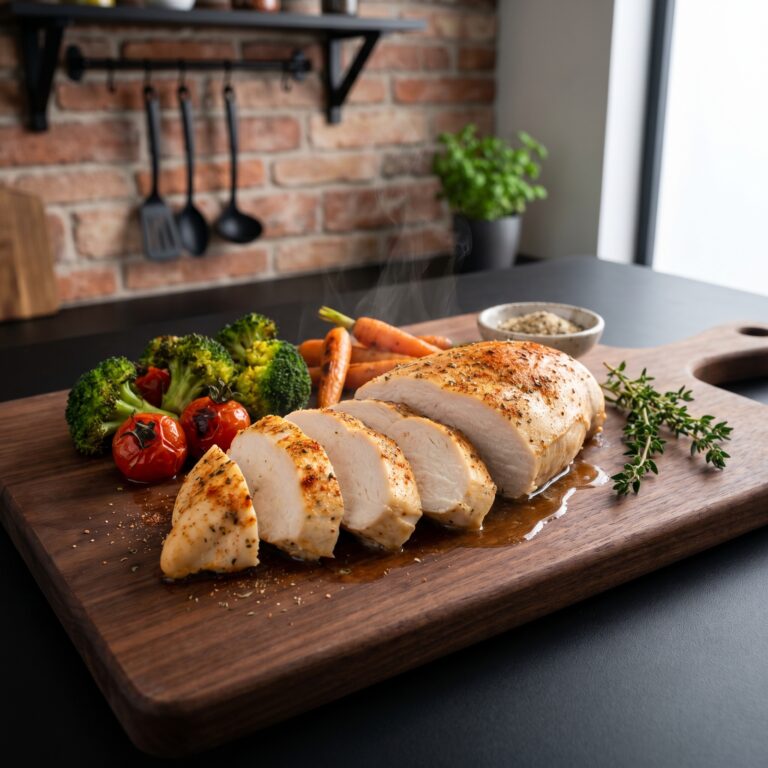
Pounding boneless chicken breasts to a uniform 3/4-inch thickness and roasting at 400°F with a 5-minute carryover rest locks in intracellular moisture without drying out the lean white meat.
Cook Juicy Oven-Baked Chicken Breast at 400°F for 22 minutes until the internal temperature reaches 160°F–162°F (Rest to 165°F). Rest for 5–10 Mins before slicing so juices redistribute and carryover heat reaches full USDA FSIS food safety standards.
Equalize Thickness: Place breasts between plastic wrap and gently pound the thick shoulder end to an even 3/4-inch thickness.
Dry and Oil: Pat dry with paper towels, then brush all sides with olive oil or melted butter to form a moisture barrier.
Generous Seasoning: Season evenly with kosher salt, black pepper, garlic powder, onion powder, and paprika.
Prep
10 min
Cook
22 min
Rest
5 min
Total
37 min
Pull Temp
160°F–162°F (Rest to 165°F)
Serves
4
Calories
380 kcal
Quick Look
Recipe
How Long to Bake Chicken Breast at 400°F (By Ounce Weight & Thickness Chart)
Get new recipes
Got chicken? Never wonder what’s for dinner again.
Originally published
Pounding boneless chicken breasts to a uniform 3/4-inch thickness and roasting at 400°F with a 5-minute carryover rest locks in intracellular moisture without drying out the lean white meat.
Even three extra minutes at 400°F turns boneless chicken breast chalky, and a thick 10-ounce supermarket breast takes nearly twice as long as a thin 5-ounce cutlet. Check our ounce-by-ounce 400°F Chicken Breast Baking Chart and carryover pull temperature below:
TEST KITCHEN STANDARD • DIRECT ANSWER
Boneless, skinless chicken breasts take 20 to 25 minutes to bake at 400°F (204°C) for standard 6- to 8-ounce breasts. Thinner cutlets require 14 to 16 minutes, while large jumbo breasts (10–12 oz) take 25 to 30 minutes. Pull chicken breast from the oven when an instant-read thermometer registers 160°F to 162°F (71°C to 72°C) and rest for 5 minutes, allowing carryover cooking to reach 165°F without squeezing out natural juices.
The Moisture Physics of White Meat: Why 165°F Out of the Oven Means Dry Chicken
Chicken breast is an ultra-lean muscle composed of approximately 73% water, 23% protein, and less than 3% intramuscular fat. Unlike chicken thighs, it contains virtually zero connective collagen to provide moisture through gelatinization. As chicken breast cooks past 150°F, muscle proteins (actin and myosin) tighten violently, acting like a wringing sponge that purges moisture into the pan.
If you leave chicken breast in the oven until the thermometer reads 165°F, carryover cooking will push the final resting temperature to 170°F–172°F. At that heat level, muscle fibers have contracted to their maximum limit, producing stringy, chalky, sawdust-like meat. Pulling at 160°F to 162°F and resting for 5 minutes allows carryover heat to achieve the USDA 165°F threshold safely while keeping intracellular juices locked inside.
The Tapered Geometry Problem: Why Pounding Is Essential
A standard chicken breast is anatomically irregular: it is up to 2 inches thick at the cranial shoulder end, but tapers to less than 1/2 inch at the caudal tip. If baked in its natural state, the thin tip will reach 175°F and turn leathery long before the thick center reaches safe pasteurization.
To solve this, place breasts between sheets of plastic wrap and use a flat meat mallet or rolling pin to lightly pound the thickest end until the entire breast is a uniform 3/4-inch thickness. Uniform thickness guarantees that every square inch finishes baking at the exact same second.
Cooking Time & Temperature Doneness Matrix
Use this calibrated timetable based on cut weight, bone anatomy, and preparation method:
Cut & Preparation
Oven Time (400°F)
Doneness Target
Texture Outcome
Thin Cut / Cutlets (1/2-inch thick, 4 oz)
14 – 16 min
160°F pull (165°F rested)
Super rapid weeknight meal prep
Standard Boneless Breast (6–8 oz, pounded to 3/4″)
20 – 25 min
160°F – 162°F pull
Peak juiciness, tender bite
Jumbo Boneless Breast (10–12 oz, unpounded)
26 – 30 min
160°F – 162°F pull
Monitor thickest point; rest 7 min
Split Bone-In, Skin-On Breast (12–14 oz)
35 – 40 min
165°F pull
Bone preserves extra moisture
Frozen Boneless Breast (Direct from freezer)
32 – 38 min
165°F pull
Tent foil first 15 min to prevent surface drying
The 4 Cardinal Mistakes That Ruin the Cook
Avoid these preventable culinary errors to guarantee juicy, crispy results:
MISTAKE #1
Leaving Chicken in Oven Until 165°F
Failing to account for carryover rise guarantees overcooked meat. Pull white meat at 160°F–162°F; internal heat will climb to 165°F during the 5-minute rest.
MISTAKE #2
Baking Uneven Breasts Without Pounding
The thin tail dries into jerky while waiting for the thick center to cook through. Always pound to uniform 3/4-inch thickness.
MISTAKE #3
Skipping the Oil Coating
Baking lean chicken breast without a light layer of oil allows oven heat to evaporate surface moisture directly into ambient air. Oil creates a protective moisture barrier.
MISTAKE #4
Slicing Without a 5-Minute Rest
Cutting hot chicken immediately causes internal steam pressure to expel liquid onto the cutting board. Rest 5 minutes under loose foil so muscle fibers reabsorb juices.
The Master Technique (Step-by-Step Food Science)
Follow this standardized test-kitchen method to achieve consistent perfection:
1
Equalize Thickness
Place breasts in a zip-top bag or between plastic wrap. Gently pound the thick shoulder end with a meat mallet until uniform 3/4-inch thickness.
2
Dry and Oil
Pat dry with paper towels, then brush with 1 tablespoon of olive oil or avocado oil. The fat locks in moisture and helps seasonings adhere.
3
Generous Seasoning
Season all sides with kosher salt, freshly ground black pepper, garlic powder, onion powder, and paprika for golden color.
4
High Heat Baking at 400°F
Arrange breasts on a parchment-lined rimmed baking sheet with space between pieces. Bake at 400°F for 20 to 25 minutes.
5
Carryover Rest
Remove when an instant-read thermometer reads 160°F–162°F at the thickest center. Transfer to a cutting board, tent loosely with foil, and rest 5 minutes.
Need a Quick Reference For Your Fridge?
Download our free 1-page printable chicken cooking chart covering pull temperatures and resting formulas for every cut.
Is it better to bake chicken breast at 350°F, 375°F, or 400°F? ▾
Baking at 400°F is superior for boneless chicken breast. High heat cooks the meat quickly (20–25 minutes), sealing in natural juices before moisture can evaporate. Baking at 350°F takes 35+ minutes and dries out the exterior before the interior finishes.
Why is my baked chicken breast tough and rubbery? ▾
Chicken breast becomes tough and rubbery for two reasons: either it was overcooked past 165°F (causing muscle fibers to contract and expel water), or it was from a broiler chicken affected by ‘woody breast’ (a muscle myopathy recognizable by white striations and tough raw texture).
Should I cover chicken breast with foil while baking? ▾
No, baking chicken breast uncovered at 400°F creates superior flavor through light surface browning. If your chicken breast is particularly large (10+ oz) and you notice edges browning too fast, you may tent foil loosely over the top during the final 5 minutes.
Can you bake chicken breast straight from frozen at 400°F? ▾
Yes. Bake frozen chicken breast at 400°F for 32 to 38 minutes. Tent loosely with foil for the first 15 minutes to allow gentle thawing, then remove foil and brush with oil and seasoning for the remaining baking time until internal temp hits 165°F.
Official Food Safety Reference
The USDA Food Safety and Inspection Service (FSIS) mandates an internal temperature threshold of 165°F (73.9°C) for instantaneous Salmonella destruction. For dark poultry meat (drumsticks and thighs), culinary science dictates cooking to 175°F–185°F to ensure complete collagen breakdown into succulent gelatin.
Pound and season chicken breasts up to 24 hours in advance. Keep covered in the refrigerator until ready to bake.
Nutrition per serving
Calories
380
Protein
32g
Fat
26g
Carbs
1g
Sodium
620mg
Sugar
0g
Calculated by Nutrifox · estimates only · varies by brand
Frequently asked
Juicy Oven-Baked Chicken Breast at 400°F, your questions.
Is it better to bake chicken breast at 350°F, 375°F, or 400°F?
Baking at 400°F is superior for boneless chicken breast because high heat cooks the meat evenly and seals in natural juices before prolonged oven exposure can dry out the exterior.
Why is my baked chicken breast tough and rubbery?
Chicken breast turns tough and rubbery when left in the oven past its carryover pull temperature, causing lean muscle fibers to contract and squeeze out their water.
Should I cover chicken breast with foil while baking?
Bake uncovered at 400°F for light golden browning, then tent loosely with foil during the 5-minute rest on the cutting board.
What makes Juicy Oven-Baked Chicken Breast at 400°F worth making?
Pounding boneless chicken breasts to a uniform 3/4-inch thickness and roasting at 400°F with a 5-minute carryover rest locks in intracellular moisture without drying out the lean white meat.
How long does Juicy Oven-Baked Chicken Breast at 400°F take to make?
Juicy Oven-Baked Chicken Breast at 400°F takes 32 minutes total: 10 min prep and 22 min cook time.
What equipment do you need for Juicy Oven-Baked Chicken Breast at 400°F?
You will need: Digital instant-read meat thermometer, Flat meat mallet or rolling pin, Commercial rimmed half-sheet pan.
What is the key technique for Juicy Oven-Baked Chicken Breast at 400°F?
Carryover Rest: Remove promptly at target pull temperature, tent loosely with foil, and rest 5 minutes before slicing against the grain.
KITCHEN INDECISION SOLVER
Staring Into the Fridge with Raw Chicken?
Select your cut (breasts, thighs, ground) and available pantry staples (rice, pasta, potatoes) in our interactive decider tool. Get instant tested dinners in 10 seconds.